Wednesday, November 17, 2010

Protein Packed Cookies

I've gotten a large number of requests for this recipe, and while I can't claim it as my own, I'm more than happy to share it because it rocks my socks!

Craving-Killing Cookies:
1 large egg
1 1/2 cup natural peanut butter ( I use smooth and lightly salted)
1 1/2 scoop whey protein powder (vanilla, chocolate or unflavored - I use chocolate)
1/2 cup Sucanat (if you are using sweetened protein powder cut sucanat back to 1/3rd cup)(took me a while to find this, but you can get it at Whole Foods)
1/2 cup almond meal
1 tsp baking soda
1/2 tsp vanilla

Preheat oven to 350.

1.)In large bowl, lightly beat egg. Add the remaining ingredients and mix well.
2.)Form into little balls with a spoon or your hands and place on a lightly greased or lined baking sheet.
3.)Bake for 12 minutes. Balls will puff up and lightly brown. Cool for a few minutes before eating.

*Ready in 25 minutes
Makes 16-20 one cookie servings.

Nutrition facts (per serving);
Calories: 100
Total Fat: 6g
Saturated Fat: 1g
Trans Fat: 0g
Cholesterol: 5mg
Sodium: 90mg
Carbohydrates: 7g
Dietary Fiber: 1g
Protein: 5g

I realize that not everyone has these things just hanging around the kitchen (particularly the protein powder) But these cookies are totally worth the obscure ingredients for their yummy taste and added bonus of being healthy or "trainer approved" as I've dubbed them. And they stick with you, one of these cookies and an apple will get you all the way through the afternoon . . . if you can stop at one ;)
Saturday, May 15, 2010

Brownie Bites

Now for a little more brownie inspiration.


Don't have time to go all out making a fancy dessert?

Simply mix together (as per box instructions) a box of brownie mix, but instead of the regular 8x8 pan, spoon into a mini-cupcake pan and bake for about 10 minutes.

While the brownie bites are baking, mix up some of this cream cheese frosting, and top each brownie with a nice swirl . . . Now you've got a fancy dessert with only half the hassle.

Fail Proof Cream Cheese Frosting

Now I think it's fair to say that I got through more powdered sugar and cream cheese than the average person does, and it's due in part to the following recipe that I seem to make on an ever too frequent basis. It's my fail proof and default frosting. Not only does it taste delicious, but in my opinion if you add a little cream cheese frosting to the everyday dessert you've dressed it up to fancy! So without further a-due:

Cream Cheese Frosting
1 8 oz package cream cheese softened (I use 1/3rd less fat, but any kind should do the trick)
1/4cup butter softened
3.5-4cups powdered sugar (go with 4 if you want it stiffer)
1tsp vanilla

Pour powdered sugar into mixing bowl and whisk a few times to get out any big clumps. Add butter, cream cheese and vanilla; beat on medium speed until you get frosting! *start with the mixer on slow so you don't get a powdered sugar cloud coming out of the bowl; it also helps to cover with a towel until ingredients are combined.

I can't take total claim for this recipe as I got it from my mother, but I do make my own variations . . . can't give away all my secrets!


Thursday, May 13, 2010

Easter Egg Cupcakes

Want to make your everyday cupcakes a little more Easter appropriate . . . .


Simply add a Robin's Egg to the top of each frosted cupcake and suddenly you're in the spring time spirit!

St. Patty's Day Cake

Here's a simple yet "festive" St. Patty's Day dessert, and the best part . . . it's semi-homemade!!


  1. Take a box of yellow cake mix; follow all the directions on the box, just add some green food coloring.
  2. Make some buttercream frosting and divide into three equal parts, color one part green, and one part orange. Leave the 3rd part white.
  3. Once cake is cooled frost green on the left, white in the middle, and orange on the right, and presto you've got a cake frosted to look like the Irish Flag!
Simple and festive!

Brownie Tips of the Trade


If your anything like me, waiting for the brownies to cool before you cut them is just simply impossible . . . which often results in crumbled uneven brownie pieces, not to mention trying to get them out of the pan. Well here are a few tricks I've picked up along the way that work very well!

  • First - to add a little of your own "flare" to the brownies you can add a chip flavor of your choice: chocolate, white chocolate, butterscotch, dark chocolate, peanut-butter, swirl, even toffee pieces, etc. You know, something to spice it up a little more than "just" nuts! And don't forget to top it with some powdered sugar to give it that "finished" look!
  • Second - if you line the pan with foil before pouring the batter, not only do you have a clean pan (one less dish to wash), but the brownies will cool faster, and be easier to cut. They cool faster because you're able to remove them from the pan just a few minutes after cooking, and place them in the foil on a cooling rack. Easier to cut . . .
  • *another added bonus to the foil is that after cutting you can wrap them back up and they are ready to go!
  • Third - cutting brownies has never been one of my skills, but I discovered this little trick of cutting them with a pizza cutter; smooth lines, and no "sawing" of the brownie; just one continues roll! This trick works best with the foil trick because if the brownies are in the pan the pizza cutter won't go all the way to the edge, but out of the pan, it runs clean through!
Hope you've found these little brownie tips helpful, have any to contribute??

Thursday, March 18, 2010

Playin' in the Kitchen

One of the things that I love about the kitchen is that it's not just for cooking and baking. The kitchen is a place for family, laughter, fun, art, creativity, experimenting, learning, loving and growing; and the list goes on . . .

Yesterday I tried my hand at a new recipe . . . Sidewalk Chalk!!

  • 1c Plaster of Paris
  • 1c Water
  • Powdered Paint
  • Any sort of mold
  1. Mix together Plaster of Paris and water
  2. Pour in powdered color of your choice and mix
  3. Let sit a few minutes and then pour into a mold of your choice
  4. Leave in mold to harden (about an hour, but could be more depending on how big your mold is)
  5. Remove from mold and let air dry the rest of the way (I left mine to dry overnight)
I bought two powdered tempera paint colors which cost $4.99 each, one bucket plaster of paris which was $5.99 and one silicon brownie bite mold which was $9.99 to make my chalk. The start up cost is a bit much in craft land but will probably last for 6-8 summers of chalk fun!
(there were two more of each color plus 10 more egg shaped ones not in this photo;
it makes a lot . . . but that was a double recipe)

You can use anything for a mold, toilet paper tubes, paper towel tubes, plastic easter eggs, etc. I chose a silicon mold because it was very easy to pop the chalk out once it set, and it was a super easy clean up. I also tried an egg carton but found that if I let them set too long the carton stuck to the chalk and it was no good. Personally for little hands I find the brownie bite size to be perfect!


Friday, January 29, 2010

The Buttermilk Dilemma


Here's the problem for me when it comes to buttermilk . . . I always end up wasting way too much of it. You see, I have one recipe that I make consistently that calls for buttermilk, but I don't make it often enough to use a whole carton of buttermilk, and since it only comes in 1/4 gallon cartons, and the fact that buttermilk goes bad pretty fast all adds up to a lot of wasted product and money; neither of which I am a big fan.

So lucky me that while I was complaining about the dilemma the other day it was suggested to me that I could make it myself . . . score one for me! I quickly went home and found this recipe for buttermilk:

4.5 teaspoons white vinager or lemon juice
1 cup milk

Pour white vinager or lemon juice into measuring cup and then fill to one cup with milk. Stir and let set for 10 to 15 minutes until it starts to curdle. Use or refrigerate.

So now, not only can I cut down on waste but I can also use all of this lemon juice that I now "begrudgingly" own!!! Score two for me

* I haven't made the buttermilk yet because I don't have any need for it at the moment, but I'm dying to give it a spin . . . who wants cupcakes!

Friday, January 22, 2010

A Baker's Hope


One thing I aspire to in my "kitchen skills" if you will, is the ability to measure things without actually measuring them. I want to know how much olive oil is enough simply by sight, and how much salt is enough simply by weight. It's something I've long since envied in all the "professionals." So this year I've decided to take it upon myself to teach myself the proper amount just by the feel in my hand (for the dry stuff of course).

Now most of the time when it comes to baking precision is a must because your looking for the proper chemical reaction, so for now I'm just practicing with salt and vanilla . . . because my philosophy is you can never have too much vanilla!!! And the salt, we'll that I've been pouring into my hand, and then from there into the measuring spoon to see how close I am . . . I'm pretty excited to say that so far I've been almost spot on ever time, so maybe it will be an easier skill to teach myself than I thought!

For now I'm off to bake some cupcakes . . .

Monday, January 18, 2010

Mizithra and Brown Butter Pasta Dish

Tonight's dinner was Mizithra and Brown butter over some sauteed chicken and pasta . . . delish!

The mazithra and brown butter is my favorite thing to order from Spaghetti Factory, and on one of my sister's visits out we brought home the leftovers, where cut to the next night, she browned some chicken and threw together a delicious meal for us!

Well shopping the other night I saw mazithra cheese and decided on a whim to throw it in the cart, and lucky me that I did!

Tonight I tried my hand at browning butter for the first time, which I've been wanting to try for a while now, and it turned out perfect if I do say so myself! And it's super easy at that, just throw a stick of butter in a pot and wait till it browns . . . it started foaming up at the end so I had to stir it to see the color, but it was perfectly golden brown. Once the butter has browned chill bottom of pot in cool water to keep the butter from burning. I fully expected to have to try it at least twice, but once was all it took!!!
I sauteed some cut up chicken in olive oil, cooked some pasta, grated some mizithra and what do you know; I had a super yummy, fairly easy dinner that felt both fancy and restaurant esq!

Wednesday, January 13, 2010

One Left-Hander's Kitchen Adventures

I've decided to start this new blog dedicated solely to my love for cooking and baking. This year I aspire to increase my skills, talents and risks in the land of the kitchen and want to share these with all of you! From here on out, I'm striving to better myself in the kitchen, make more things from scratch, make thing with my twist, and to just have a lot of fun. I'll be using this blog to share my adventures, quotes or whit, books, recipes and anything else that pertains to the subject at hand.

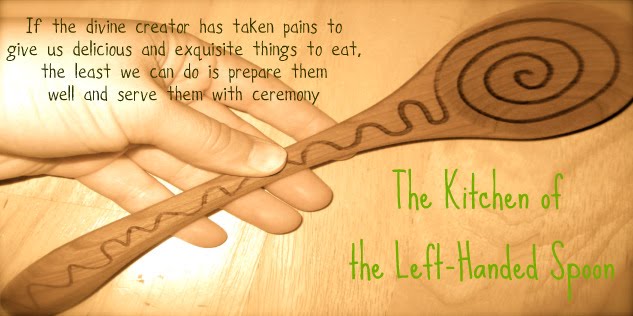
To start, I came up with the name of this blog based on a left handed spoon my mother bought me for Christmas (or maybe it was from Santa!) two years ago . . . if you know me, you know two things . . . I'm left handed, and I love being in the kitchen! I often point out the fact that the world is made for all you right handers, which makes life in the kitchen a littler tricker for us "south-paws!" This particular spoon is angled for a "lefty" and makes the life of a stirrer much easier!

I hope you enjoy this journey as much as I do, and if your lucky you may be the recipient of my creations, I'm always in the market for samplers! For now I'll leave you with this little quote . . .

"Relationships are complicated, cooking comes with instructions"